Emergency lights play an important role in safety. They help
people find their way when the power goes out. You see them in offices,
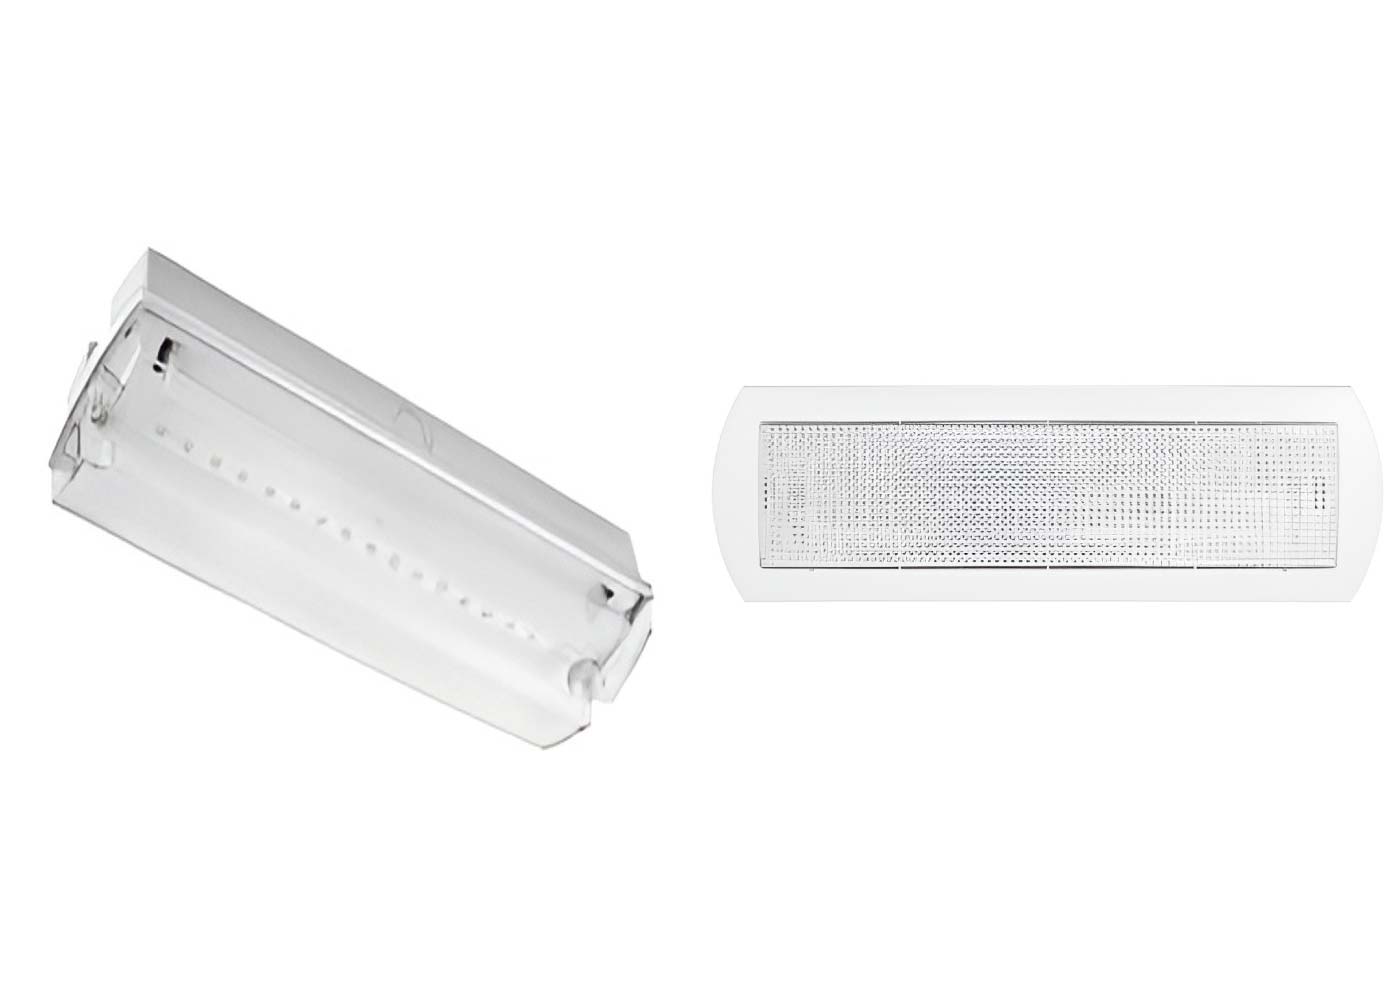
schools, malls, and even apartment buildings. There are two common types of
emergency lights: surface mounted and recessed. Both are useful, but their
installation steps are slightly different. This guide will walk you through the
process in a clear and simple way.
Surface mounted lights are fixed on the outside of walls or
ceilings. They are easier to install because they do not require cutting into
the surface. The body of the light is visible, but it is quick to access for
service.
Recessed lights are installed inside the ceiling or wall.
Only the light panel or trim is visible. This style looks cleaner and blends
with the design of the space. However, recessed installation requires more work
since you need to make an opening and plan the wiring carefully.
Before starting, gather the basic tools. This will make the
job easier and safer.
- Drill and drill bits
- Screwdriver set
- Wire cutter and stripper
- Measuring tape
- Pencil or marker
- Utility knife or drywall saw (for recessed type)
- Anchors and screws
- Electrical tape
- Ladder
- Safety gloves and glasses
Also, have the emergency light units ready. Check that the
batteries are included or buy them separately.
Working with electrical wiring is not a task to rush. Turn
off power at the main breaker before starting. Use a voltage tester to be sure
that wires are not live. Always wear insulated gloves when handling wires. If
you are not confident about wiring, ask a licensed electrician for help.
Choose a spot where the light will be most effective. Place
emergency lights near exits, hallways, and stairways. For surface mounted
units, make sure there is a solid wall or ceiling section to support the
fixture. For recessed units, confirm that there is enough space behind the
ceiling or wall to hold the housing.
Measure the height. Most lights work best when placed at
least 7 feet above the floor. Mark the location with a pencil.
Both types of lights need a constant power source to keep
the internal battery charged. Run the supply wire from the nearest junction box
to the location of the light. Leave extra length so that you can connect it
easily.
Strip about half an inch of insulation off the wire ends.
Keep the neutral, live, and ground wires ready.
1. Mount the base – Hold the mounting plate against the
marked spot. Drill holes and insert wall anchors if needed. Screw the base into
place.
2. Connect the wires – Match live to live (usually black),
neutral to neutral (usually white), and ground to ground (green or bare). Twist
the wires together and wrap them with electrical tape.
3. Fix the body – Place the emergency light body onto the
base and secure it with screws.
4. Insert the battery – Open the battery cover and put in
the backup battery if it is not pre-installed.
5. Test the unit – Switch on the power and press the test
button to see if the lights turn on.
Surface mounted units are usually simple and can be
installed in less than an hour.
Recessed lights need more careful preparation. Follow these
steps:
1. Cut the opening – Trace the outline of the housing on the
ceiling or wall using the template provided. Cut along the line with a utility
knife or drywall saw.
2. Fit the housing – Slide the recessed housing into the
opening. Make sure it sits flush with the surface. Some units come with clips
that lock into the drywall.
3. Connect the wires – As with the surface unit, connect
live, neutral, and ground wires properly. Keep the connections tight and
insulated.
4. Secure the housing – Use screws or clips to fix the
housing firmly.
5. Attach the trim – Snap or screw the trim into place so
that only the visible part of the light shows.
6. Insert the battery – Place the backup battery in its
slot.
7. Test the unit – Restore power and press the test button
to make sure the light works.
Once both types are installed, check the following:
- The light turns on during a power cut test.
- The charging indicator (if available) glows when the unit
is plugged into power.
- The battery holds charge for the required time (most units
are designed to last at least 90 minutes).
- The fixtures are firmly attached and do not wobble.
Walk around the space to see if the placement covers dark
areas. Adjust the light heads if they are adjustable.
Emergency lights need care to stay reliable. Test them once
a month by pressing the test button. Replace the battery every few years or as
recommended by the maker. Dust the units to prevent dirt from blocking the
light. Keep a record of test dates if you are installing them in a workplace or
public building.
While surface mounted units can often be handled by a
careful person with basic tools, recessed units may require skill with wiring
and drywall cutting. If you are unsure about code rules or wiring safety, call
a licensed electrician. It is better to be safe than risk faulty wiring.
Installing emergency lights is a simple but important task.
Surface mounted units are quick and easy to put up, while recessed units need
more planning and effort but give a cleaner look. Both types make a building
safer and more prepared for a power cut. With the right tools, careful steps,
and regular checks, you can make sure your emergency lights are ready when
needed.
Website and SEO By Poland Web Designer
Guard Master © Copyrights 2020 - . All rights reserved.